ACSII II Guide to Geometric Morphometrics in MorphoJ
3. MorphoJ User Interface
MorphoJ does not create a data file for geometric morphometrics. MorphoJ also can not analyze outline data. MorphoJ can import raw landmark data from tab- or comma-delimited text files or from other morphometric software: the TPS series (http://life.bio.sunysb.edu/morph/soft-tps.html), NTSYSpc (Rohlf 2008) and Morphologika (O’Higgins & Jones 1998). The MorphoJ web page has an excellent user guide which is available online at
http://www.flywings.org.uk/MorphoJ_guide/frameset.htm?index.htm
What follows is a step by step simple user guide for the beginners. For advanced analysis the online MorphoJ user guide is a good reference.
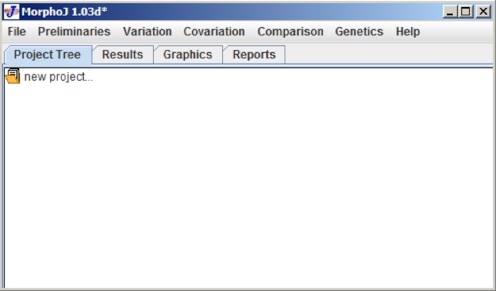
3.1. MorphoJ Main Window
MorphoJ has a graphical user interface from which all analyses can be done. There can be multiple analyses for one or multiple data sets. The datasets and analyses are organized into a project.
At the top of the MorphoJ window there is a menu bar with seven menus named as follows: File, Preliminaries, Variation, Covariation, Comparison, Genetics and Help. These are the menus used to complete an analysis using MorphoJ.
There are four tabs under the menu bar: Project Tree, Results, Graphics and Reports. Each of these menu bars allows you to view different aspects of the analyses.
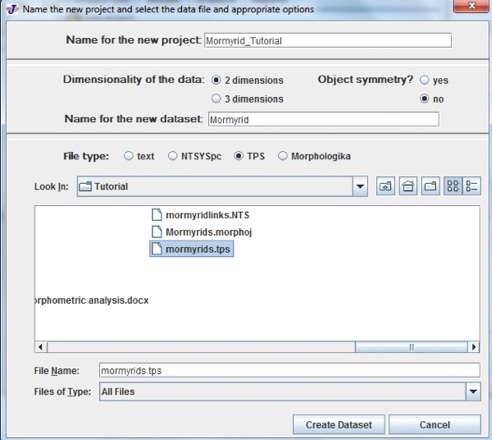
Create new project: To create a new project click on the file menu and select Create new project which opens the following dialog box:
1. At the very top of the dialog box is the text box for naming the new project. Select a project name and choose the Dimensionality of data, if it is a 2D or 3D dataset (usually 2D). ‘Object symmetry’ is if all of your landmarks have bilateral symmetry, for a lateral view, this would be unchecked. The 2nd text box is Name for the new dataset and choose the File type. File type is what kind of data file is going to be imported in MorphoJ. For our analysis we are using Mormyrid.tps as data file and it is a 2D data set.
2. MorphoJ always opens in ‘My Documents’ in Windows and ‘Documents’ in MacOS. Navigate to the file. After selecting the correct data file select Create Dataset, which adds the data file in MorphoJ.
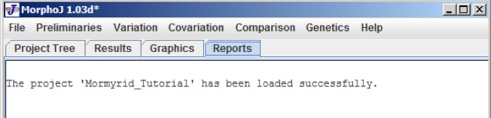
3. Once the data set has been created, click on the report tab which gives a message “the project 'Mormyrid_Tutorial' has been loaded successfully”.
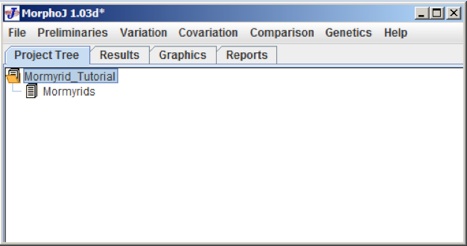
The following screen shot shows the elements of the user interface and how it looks as we create the new project and data set.
4. To create another data set under the same project select File menu and click on the Create New Data set and do the selection as appropriate with the data set.
5. To save a project select File menu and select Save or Save Project As. When you save a project it saves as given projectname.morphoJ. For our example here the project name is Mormyrid_Tutorial.morphoJ
6. If there is a project already saved it could be always opened by selecting – File>Open project or Open Recent Project, which will open the most recent projects.